2023-11-3 给主题添加一个后台简单的设置页面
在主题模板中,找了一个最简单的404.php看了一下
第一行:<?php get_header('home');?>,它的作用是引入名为 "header-home.php" 的模板文件
最后一行为:<?php get_footer();?>,它的作用是引入名为 "footer.php" 的模板文件
可见()后面是看是否有后缀-
制作包材料下载链接,有兴趣的,可以自己去学习一下哦:


正在加载二维码...
然后我跟踪到header-home.php文件,发现就一行代码:
<?php get_template_part( 'top' ); ?>
这个为什么不用<?php get_top();?>呢?
因为get_top() 并不是 WordPress 内置的函数,因此它不会起到加载模板文件的作用!
那是否可以使用<?php get_template_part( 'header-home ' ); ?>来调取WordPress 内置的函数?
经过测试,可以使用,能正常读取到头部文件!
20231106补充:今天对这个还发现了另外一个用法: get_template_part( 'template-parts/banner/banner-yestext' ); 这样的,可以直接通过目录来抓取需要的模板!
继续跟进到top.php文件,发现代码量就上来了!是一个综合头部文件,在title标签中使用if函数,如下:
<?php if ( is_home() ) {
bloginfo('name');
echo " - "; bloginfo('description');
} elseif ( is_category() ) {
single_cat_title(); echo " - "; bloginfo('name');
} elseif (is_single() || is_page() ) {
single_post_title(); echo " - "; bloginfo('name');
} elseif (is_search() ) {
echo "搜索结果"; echo " - "; bloginfo('name');
} elseif (is_404() ) {
echo '页面未找到!';
} else {
wp_title('',true);
} ?>
这个有点长,一个个来看!
is_home() 是一个条件函数,用于检查当前页面是否为首页。is_home() 函数返回一个布尔值,如果当前页面是首页,则返回 true,否则返回 false。
bloginfo('name'); 是 WordPress 提供的内置函数之一,它是在 WordPress 后台的 "设置" -> "常规" 页面中设置的~
single_cat_title() 也是 WordPress 提供的内置函数之一,在后台添加分类,并命名分类时,就自动设置好了,在抓取时无需额外设置, single_post_title(); 同理
通过if判断,来实现不同页面,可以显示不同的页面标题;
接下来,在这个top文件下,又有一个<?php require 'seo.php'; ?>,看名字应该是用来设置seo有关的,我打算去seo.php看一下
if (is_home()) {
$seo = cs_get_option( 'seo' );
$description = $seo['web_description'];
$keywords = $seo['web_keywords'];
}
cs_get_option() 是一个用于获取主题选项值的函数
那么主题设置文件在哪里呢?
了解到可以通过设置主题的functions.php进行钩子回调,然后决定创建一个测试主题!
在解决这一步的过程中,需要创建一个测试主题,然后...
在主题ceshi文件夹中新建了functions.php后,回到wp后台打算启动测试主题,发现提示缺少样式表,于是添加了style.css文件
然后又提示模板丢失。独立主题需要包含 templates/index.html 或 index.php,于是我又新建了一个index.php
至此,我发现这个主题可以启用了!同时,如果需要在wp后台主题选择中,看到主题预览图,还能添加一个screenshot.png截图
因此,主题启动所需的文件,包括:index.php,style.css,functions.php,以及screenshot.png(可有可无)
然后,我在主题模板下新建了一个theme-settings.php,用于提交表单到数据库
<?php
if (isset($_POST['submit'])) {
$name = $_POST['name'];
update_option('name', $name); //更新WordPress自带一个名为wp_options的数据表中name的字段,为$name,这个都可以自定义!
}
?>
<!-- 在这里添加你的表单和其他设置选项的HTML代码 -->
<form method="post" action="">
<label for="name">名称:</label>
<input type="text" id="name" name="name" value="<?php echo get_option('name'); ?>" />
<!-- get_option('name'); 读取这个参数,通过上面的isset将值保存到数据库 -->
<input type="submit" name="submit" value="保存设置" />
</form>
?>
这样就可以设置一些主题所需的参数
然后在functions.php中添加
<?php
function add_theme_settings_page() {
add_menu_page(
'主题设置1',
'主题设置2',
'manage_options',
'theme-settings',
'theme_settings_page',
'dashicons-admin-generic',
100
);
}
add_action('admin_menu', 'add_theme_settings_page');
function theme_settings_page() {
include_once('theme-settings.php');
}
?>
用于在wp后台回调,进行设置,其中:
1. `'主题设置1'`:页面的标题
2. `'主题设置2'`:显示在WordPress后台左侧菜单标题。
3. `'manage_options'`:访问该菜单页面所需的用户权限。在这个例子中,`manage_options`表示只有具有`manage_options`权限的用户(通常是管理员)才能访问该页面。
4. `'theme-settings'`:菜单页面的唯一标识符,用于在代码中引用该页面,因为之前创建的是theme-settings.php
5. `'theme_settings_page'`:回调函数的名称,当用户访问菜单页面时,该函数将被调用来加载页面内容。
6. `'dashicons-admin-generic'`:菜单图标的类名,用于在菜单中显示一个图标。这里使用了Dashicons图标库中的`dashicons-admin-generic`类。
7. `100`:菜单在左侧菜单中的位置(数字越小,位置越靠前)。
然后在index.php中添加
<?php
if (is_home()) {
$ceshi = get_option('name');
echo $ceshi;
}
?>
打开首页后发现,可以出现数据库中保存的值了
给自己安排的作业,可以结合后台,给模板设置一个header.php~
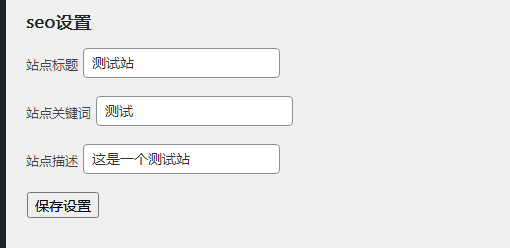
主题设置里,增加一个seo设置,设置首页的TDK
在theme-settings.php中新建
<?php
if (isset($_POST['submit'])) {
$zhandianbiaoti = $_POST['zhandianbiaoti'];
$zhandianguanjianci = $_POST['zhandianguanjianci'];
$zhandianmiaoshu = $_POST['zhandianmiaoshu'];
update_option('zhandianbiaoti', $zhandianbiaoti);
update_option('zhandianguanjianci', $zhandianguanjianci);
update_option('zhandianmiaoshu', $zhandianmiaoshu);
}
?>
<!-- 在这里添加你的表单和其他设置选项的HTML代码 -->
<form method="post" action="">
<h2>seo设置</h2>
<label for="name">站点标题 </label>
<input type="text" id="name" name="name" value="<?php echo get_option('zhandianbiaoti'); ?>" />
<br>
<br>
<label for="name">站点关键词 </label>
<input type="text" id="name" name="name" value="<?php echo get_option('zhandianguanjianci'); ?>" />
<br>
<br>
<label for="name">站点描述 </label>
<input type="text" id="name" name="name" value="<?php echo get_option('zhandianmiaoshu'); ?>" />
<!-- 其他设置选项 -->
<br>
<br>
<input type="submit" name="submit" value="保存设置" />
</form>
效果:
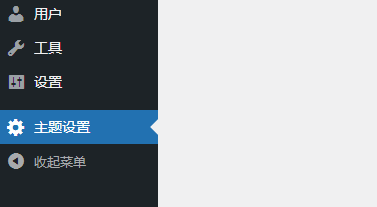
然后在functions.php中添加
<?php
function add_theme_settings_page() {
add_menu_page(
'主题设置',
'主题设置',
'manage_options',
'theme-settings',
'theme_settings_page',
'dashicons-admin-generic',
100
);
}
add_action('admin_menu', 'add_theme_settings_page');
function theme_settings_page() {
include_once('theme-settings.php');
}
?>
效果:
然后在创建一个header.php
<!DOCTYPE html>
<html>
<head>
<meta charset="UTF-8">
<meta name="renderer" content="webkit"/>
<meta name="force-rendering" content="webkit"/>
<meta http-equiv="Cache-Control" content="no-siteapp" />
<!--[if IE]><meta http-equiv='X-UA-Compatible' content='IE=edge,chrome=1'><![endif]-->
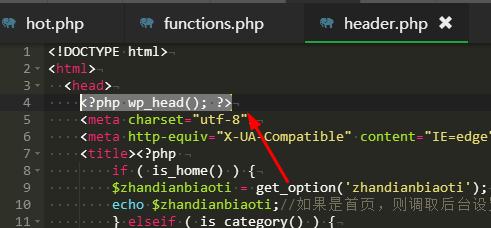
<title><?php
if ( is_home() ) {
$zhandianbiaoti = get_option('zhandianbiaoti');
echo $zhandianbiaoti;
}
?></title>
<meta name="keywords" content="<?php
if ( is_home() ) {
$zhandianguanjianci = get_option('zhandianguanjianci');
echo $zhandianguanjianci;
}
?>" />
<meta name="description" content="<?php
if ( is_home() ) {
$zhandianmiaoshu = get_option('zhandianmiaoshu');
echo $zhandianmiaoshu;
}
?>" />
</head>
然后在index.php中添加了<?php get_header();?>
最后访问首页源码,如下:
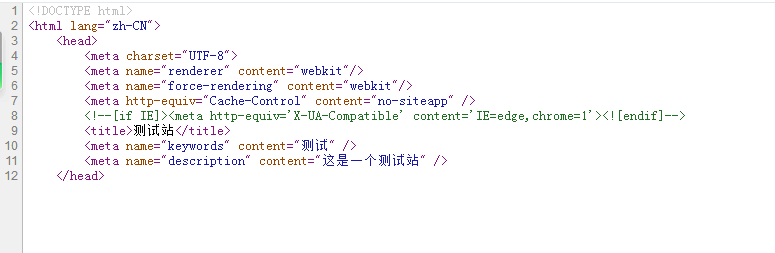
非常给力捏!!!
2023-11-6 列表页调取封面图
今天打开single-case.php,是一个case页的列表页面
先是看到了<?php the_post_thumbnail(); ?>
了解后,这是一个WordPress函数,用于在文章或页面中显示当前文章的特色图片!那么我就想如果要设置抓取图片的大小,或者怎么让它自适应呢?
可以使用自定义一个class来操作,然后调取带有自定义的class,比如:
<?php the_post_thumbnail('large', ['class' => 'custom-thumbnail']); ?>
然后在css文件中设置一个class
.custom-thumbnail {
max-width: 100%;
height: auto;
}
今天时间不多,先看到这吧~
2023-11-9 找个模板制作一个header.php
我感觉这样弄起来不系统,所以我想着干脆直接学习做一个主题项目,于是我随便找了一个博客的bootsrap模板,然后结合项目去学习,一步步操作~
那么今天就先学习弄一个hearder.php
在模板的index.php中,我找到了头部:
<!DOCTYPE html>
<html>
<head>
<meta charset="utf-8">
<meta http-equiv="X-UA-Compatible" content="IE=edge">
<title>Home</title>
<meta name="description" content="">
<meta name="viewport" content="width=device-width, initial-scale=1">
<meta name="robots" content="all,follow">
<!-- Bootstrap CSS-->
<link rel="stylesheet" href="vendor/bootstrap/css/bootstrap.min.css">
<!-- Font Awesome CSS-->
<link rel="stylesheet" href="vendor/font-awesome/css/font-awesome.min.css">
<!-- Custom icon font-->
<link rel="stylesheet" href="css/fontastic.css">
<!-- Google fonts - Open Sans-->
<link rel="stylesheet" href="https://fonts.googleapis.com/css?family=Open+Sans:300,400,700">
<!-- Fancybox-->
<link rel="stylesheet" href="vendor/@fancyapps/fancybox/jquery.fancybox.min.css">
<!-- theme stylesheet-->
<link rel="stylesheet" href="css/style.default.css" id="theme-stylesheet">
<!-- Custom stylesheet - for your changes-->
<link rel="stylesheet" href="css/custom.css">
<!-- Favicon-->
<link rel="shortcut icon" href="favicon.png">
<!-- Tweaks for older IEs--><!--[if lt IE 9]>
<script src="https://oss.maxcdn.com/html5shiv/3.7.3/html5shiv.min.js"></script>
<script src="https://oss.maxcdn.com/respond/1.4.2/respond.min.js"></script><![endif]-->
</head>
<body>
<header class="header">
<!-- Main Navbar-->
<nav class="navbar navbar-expand-lg">
<div class="search-area">
<div class="search-area-inner d-flex align-items-center justify-content-center">
<div class="close-btn"><i class="icon-close"></i></div>
<div class="row d-flex justify-content-center">
<div class="col-md-8">
<form action="#">
<div class="form-group">
<input type="search" name="search" id="search" placeholder="What are you looking for?">
<button type="submit" class="submit"><i class="icon-search-1"></i></button>
</div>
</form>
</div>
</div>
</div>
</div>
<div class="container">
<!-- Navbar Brand -->
<div class="navbar-header d-flex align-items-center justify-content-between">
<!-- Navbar Brand --><a href="index.html" class="navbar-brand">Bootstrap Blog</a>
<!-- Toggle Button-->
<button type="button" data-toggle="collapse" data-target="#navbarcollapse" aria-controls="navbarcollapse" aria-expanded="false" aria-label="Toggle navigation" class="navbar-toggler"><span></span><span></span><span></span></button>
</div>
<!-- Navbar Menu -->
<div id="navbarcollapse" class="collapse navbar-collapse">
<ul class="navbar-nav ml-auto">
<li class="nav-item"><a href="index.html" class="nav-link active ">Home</a>
</li>
<li class="nav-item"><a href="blog.html" class="nav-link ">Blog</a>
</li>
<li class="nav-item"><a href="post.html" class="nav-link ">Post</a>
</li>
<li class="nav-item"><a href="#" class="nav-link ">Contact</a>
</li>
</ul>
<div class="navbar-text"><a href="#" class="search-btn"><i class="icon-search-1"></i></a></div>
<ul class="langs navbar-text"><a href="#" class="active">EN</a><span> </span><a href="#">ES</a></ul>
</div>
</div>
</nav>
</header>
那么要处理的点是:第一个TDK要随着不同的页面变化;第二个是导航的调取 ;同时结合之前写的简单后台,进行处理~
1 通过IF函数设置不同页面,显示不同的TDK,目前测试下来,首页可以正常显示,分类也和文章页还没做,所以简单处理了一下!后续做到的时候,再进行添加!
这个也比较简单,按照基础的调取方式就行,网上查一下就知道了!
2 然后就是导航调取
在导航调取时,发现要先设置菜单,然后发现仪表盘中 外观>菜单 没有,了解后得知,需要在主题的functions.php中增加这个功能,具体代码如下:
// 后台外观添加菜单
register_nav_menus( array(
'primary' => __( '顶部导航', '顶部导航' ), //前面值 是导航菜单位置名称,后面值 是翻译用的,能让国际看懂
'social' => __( '侧栏导航', '侧栏导航' ),
) );
然后在后台就能正常设置导航了!如下图:

然后就是怎么调取导航了!关于导航的调取,也是费了我不少2个下午的时间!小白还是不容易啊!
找了很多资料,最后还是使用了wp_nav_menu这个函数~
首先看模板的源码是这样的:
<div id="navbarcollapse" class="collapse navbar-collapse">
<ul class="navbar-nav ml-auto">
<li class="nav-item"><a href="index.html" class="nav-link active ">Home</a></li>
<li class="nav-item"><a href="blog.html" class="nav-link ">Blog</a>
</li>
<li class="nav-item"><a href="post.html" class="nav-link ">Post</a>
</li>
<li class="nav-item"><a href="#" class="nav-link ">Contact</a>
</li>
</ul>
</div>
这是一个简单的导航
然后用wordpress调取的源码是这样的:
<div id="navbarcollapse" class="collapse navbar-collapse">
<?php
wp_nav_menu( array(
'theme_location' => 'primary', // 替换为你主题中定义的导航菜单位置
'container' => 'ul',
'menu_class' => 'navbar-nav ml-auto',
) );
?>
</div>
其中'theme_location 就是 functions.php注册的菜单值! 我这边是设置了primary为顶部~
container就是容器为ul
menu_class 就是这个ul的class名字就什么
设置好以后,导航就被成功调取出来了!如图:

然后你会发现,li的样式都丢失了!
因为我们选择的容器是ul!
所以我尝试了将li作为容器,尝试后失败了!所以我就不多说了!
至于另外的解决方案,就是将li的css单独设置规范一下!写入css~
比如在hearder.php上面写个style
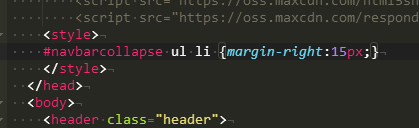
最后导航就能基本完成了!如图:
2023-11-13 制作首页海报banner.php调取
这边应该是轮播的banner,但是这个模板好像不是轮播图
所以我打算做个后台设置,做个指定文章的跳转
那难点就2个了!
1 怎么在后台上传自定义图片
2 a标签跳转设置
写处理简单的,a标签跳转:
前台调用特定文章的链接和标题,您可以使用get_permalink()函数和get_the_title()函数。
$shouyezhiding = get_option('shouyezhiding'); //获取自定义文章ID
$permalink = get_permalink($shouyezhiding); //自定义文章链接
$title_zidingyi = get_the_title($shouyezhiding); //自定义文章标题
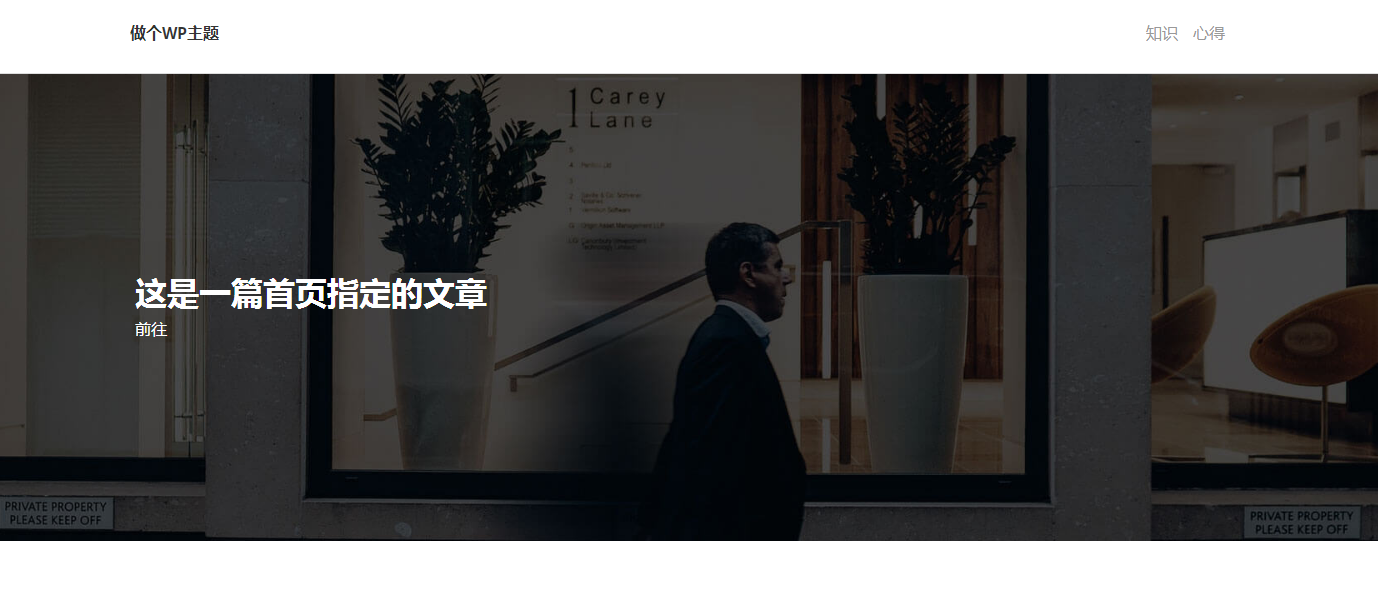
实现后的大致样子如下:

然后就是后台上传自定义图片要怎么处理了?
<?php
if (isset($_POST['submit'])) {
$zhandianbiaoti = $_POST['zhandianbiaoti'];
$zhandianguanjianci = $_POST['zhandianguanjianci'];
$zhandianmiaoshu = $_POST['zhandianmiaoshu'];
$shouyezhiding = $_POST['shouyezhiding'];
// 更新其他设置选项
update_option('zhandianbiaoti', $zhandianbiaoti);
update_option('zhandianguanjianci', $zhandianguanjianci);
update_option('zhandianmiaoshu', $zhandianmiaoshu);
update_option('shouyezhiding', $shouyezhiding);
}
// 检查是否选择了文件
if (!empty($_FILES['theme_image']['name'])) {
$uploaded_image = $_FILES['theme_image'];
// 上传图片到媒体库
$upload_overrides = array('test_form' => false);
//创建了一个名为$upload_overrides的关联数组,这个数组可以用来覆盖默认的上传设置,这里的设置是禁用测试表单验证。
$attachment_id = media_handle_upload('theme_image', 0, array(), $upload_overrides);
//media_handle_upload()函数来处理上传的文件,'theme_image'是表单中文件输入字段的名称,用于指定要处理的文件;0是要将媒体附件连接到的帖子ID。在这里,0表示将其作为无关联的媒体附件添加到媒体库中;array()是一个可选参数,用于传递附加的媒体信息,如标题、描述等。在这里,这里没有传递任何额外的信息;$upload_overrides是一个可选参数,用于覆盖默认的上传设置
if (!is_wp_error($attachment_id)) {
// 获取附件的URL
$attachment_url_shouye = wp_get_attachment_url($attachment_id);
// 将附件URL保存到数据库option下的theme_image_url字段里
update_option('theme_image_url', $attachment_url_shouye);
}
}
?>
<!-- 在这里添加你的表单和其他设置选项的HTML代码 -->
<form method="post" action="" enctype="multipart/form-data">
<h2>seo设置</h2>
<label for="name">站点标题 </label>
<input type="text" id="name" name="zhandianbiaoti" value="<?php echo get_option('zhandianbiaoti'); ?>" />
<br>
<br>
<label for="name">站点关键词 </label>
<input type="text" id="name" name="zhandianguanjianci" value="<?php echo get_option('zhandianguanjianci'); ?>" />
<br>
<br>
<label for="name">站点描述 </label>
<input type="text" id="name" name="zhandianmiaoshu" value="<?php echo get_option('zhandianmiaoshu'); ?>" />
<!-- 其他设置选项 -->
<br>
<br>
<h2>首页设置</h2>
<label for="name">首页置顶文章ID设置 </label>
<input type="text" id="name" name="shouyezhiding" value="<?php echo get_option('shouyezhiding'); ?>" />
<br>
<br>
<label for="theme_image">首页置顶文章自定义背景图</label>
<input type="file" name="theme_image" id="theme_image">
<br>
<br>
<input type="submit" name="submit" value="保存设置" />
</form>
其中图片处理的代码为:
// 检查是否选择了文件
if (!empty($_FILES['theme_image']['name'])) { //条件语句,检查是否有一个名为"theme_image"的文件被上传
$uploaded_image = $_FILES['theme_image']; //有的话,则通过$_FILES['theme_image']来获取上传的文件信息,并将其赋值给变量$uploaded_image
// 上传图片到媒体库
$upload_overrides = array('test_form' => false);
$attachment_id = media_handle_upload('theme_image', 0, array(), $upload_overrides);
if (!is_wp_error($attachment_id)) {
// 获取附件的URL
$attachment_url_shouye = wp_get_attachment_url($attachment_id);
// 将附件URL保存到数据库
update_option('theme_image_url', $attachment_url_shouye);
}
}
然后就会发现,其中很多功能都是不需要的,因此简化为:
// 检查是否选择了文件
if (!empty($_FILES['theme_image']['name'])) { // 'theme_image'是表单中文件上传字段的名称,而['name']表示要获取的文件名。因此,$_FILES['theme_image']['name']可以获取到被上传文件的原始文件名。
// media_handle_upload 为上传图片到媒体库函数
$attachment_id = media_handle_upload('theme_image','0'); //参数0表示没有指定父级帖子的ID,这一定得加,不加就会出错,亲测!
if (!is_wp_error($attachment_id)) { // 图片是否成功上传到了媒体库,成功的话,则进行下面步骤
// 获取附件的URL
$attachment_url_shouye = wp_get_attachment_url($attachment_id);
// 将附件URL保存到数据库
update_option('theme_image_url', $attachment_url_shouye);
}
}
测试后,完全没有问题!
然后就是
<form method="post" action="" enctype="multipart/form-data">
wordpress在处理上传图片时,要加上enctype="multipart/form-data",不加就没法上传!
最后就是主题模板下创建一个“haibao.php”
<?php
$shouye_image_url = get_option('theme_image_url');
echo '<section style="background: url(' . $shouye_image_url . '); background-size: cover; background-position: center center" class="hero">';
?>
<div class="container">
<div class="row">
<div class="col-lg-7">
<?php
$shouyezhiding = get_option('shouyezhiding'); //获取自定义文章ID
$permalink = get_permalink($shouyezhiding); //自定义文章链接
$title_zidingyi = get_the_title($shouyezhiding); //自定义文章标题
echo '<h2>'.$title_zidingyi.'</h2><a style="color: white;" href='.$permalink.'>前往</a>';//输出调取
?>
</div>
</div>
</div>
</section>
最后,就能实现自定义图片和文章了!如图:
2023-11-14 首页简介jianjie.php调取
下面就做这个模板简介部分了~
这个比较简单,经过上面的学习,无非就是后台做2个输入框,把数据上传到服务器,然后前端调取一下~
先做后台设置,先是输入框
<label for="name">首页简介模块标题 </label>
<input type="text" id="name" name="jianjiebiaoti" value="<?php echo get_option('jianjiebiaoti'); ?>" />
<br>
<br>
<label for="name">首页简介模块内容 </label>
<input type="text" id="name" name="jianjieneirong" value="<?php echo get_option('jianjieneirong'); ?>" />
然后上面做一个上传更新数据库
$jianjiebiaoti = $_POST['jianjiebiaoti'];
$jianjieneirong = $_POST['jianjieneirong'];
update_option('jianjiebiaoti', $jianjiebiaoti);
update_option('jianjieneirong', $jianjieneirong);
就和之前做站点标题关键词描述一个样子,简单~
弄好以后,后台就多了2个输入框,然后大致输入一下简介内容,如下:

接下来就是在模板主题上调用了!新建jianjie.php,然后在index.php中引入:
<?php get_header();?>
<?php get_template_part('haibao'); ?>
<?php get_template_part('jianjie'); ?>
然后在jianjie.php中做一下调用:
<section class="intro">
<div class="container">
<div class="row">
<div class="col-lg-8">
<?php
$jianjiebiaoti = get_option('jianjiebiaoti');
$jianjieneirong = get_option('jianjieneirong');
echo '<h2 class="h3">'.$jianjiebiaoti.'</h2>';
echo '<p class="text-big">'.$jianjieneirong.'</p>';
?>
</div>
</div>
</div>
</section>
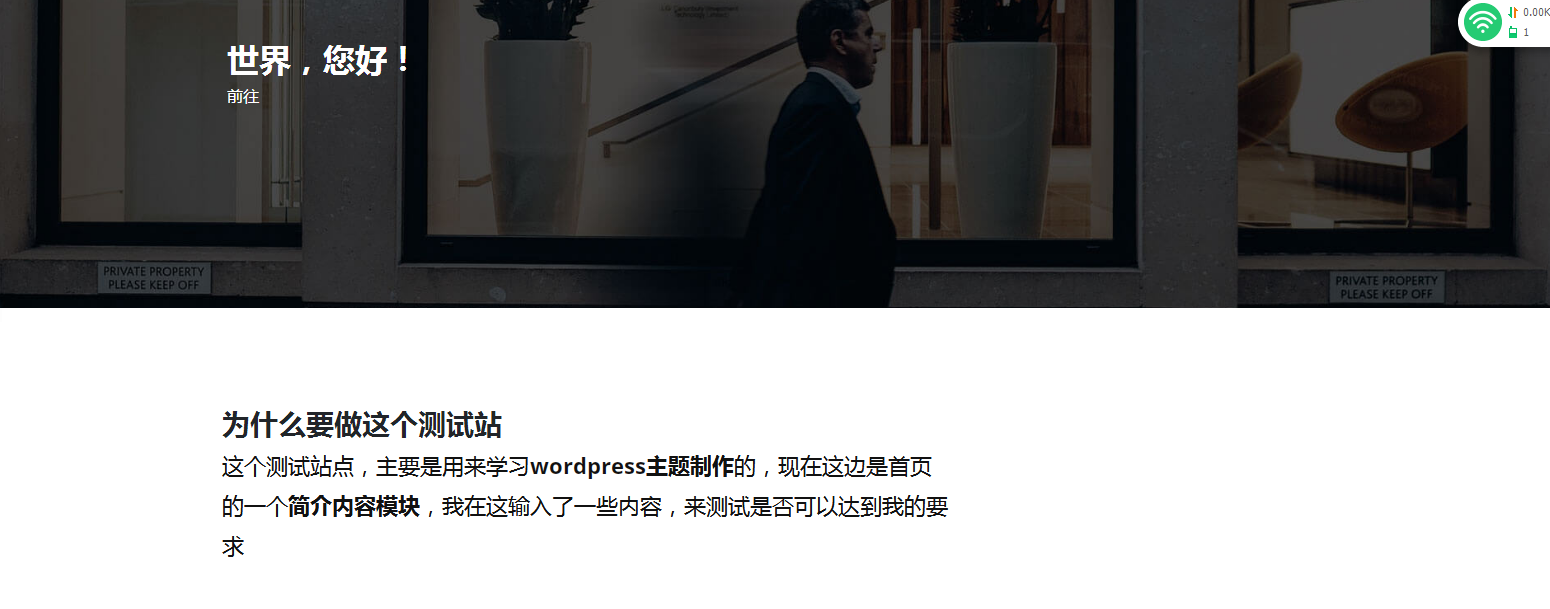
完成后,效果如下显示:
2023-11-15 文章阅读量计数调取
这边打算调取阅读量高的前3篇,作为首页热门推荐,但是想到一个问题,默认主题可能没有阅读量参数,那要怎么增加阅读量数据呢?
在网上找到方法,在functions.php中增加以下代码:
//给文章增加阅读量数据
function record_visitors(){ //增加一个record_visitors,用于统计文章阅读量
if (is_singular()){ //is_singular()判断文章是否为单一页面
global $post; //将文章变成全局变量,这样就是在函数内访问post表中的数据,比如标题,内容等
$post_ID = $post->ID; //获取文章ID,赋值给$post_ID
if($post_ID){ //判断如果页面ID存在
add_post_meta($post_ID, 'views', 1, true);
//增加给指定文章ID的meta数据库表中增加views字段,并给值1,ture的意思是当这个post表中已经存在views就不重复增加了
$post_views = (int)get_post_meta($post_ID, 'views', true);
//获取views字段值给$post_views
update_post_meta($post_ID, 'views', ($post_views+1));
//更新views值+1
}
}
}
add_action('wp_head', 'record_visitors');
//添加一个钩子,就是访问到wp_head函数的页面和record_visitors同步
同时,我也给大家注释了,方便记录学习!
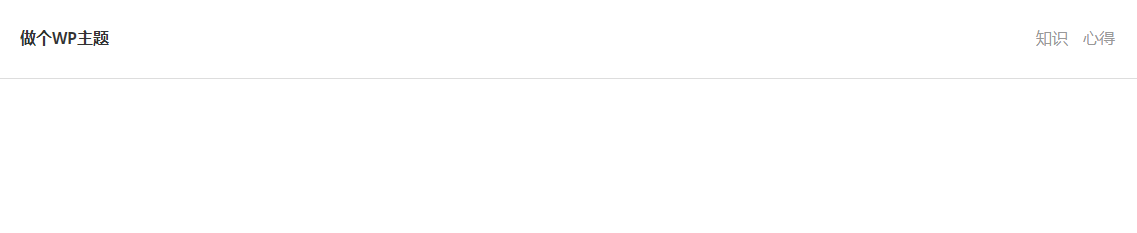
需要注意的是,add_action('wp_head', 'record_visitors'); ,因此在heard.php需要增加<?php wp_head(); ?>,这样当页面访问,就能触发record_visitors函数了!
然后在文章页要调取阅读量,就可以使用以下代码:
<?php
$views = get_post_meta(get_the_ID(), 'views', true); // 获取当前文章的阅读量
echo '阅读量:' . $views; // 在页面上输出阅读量
?>
哎呀,太复杂了,今天就到这吧~
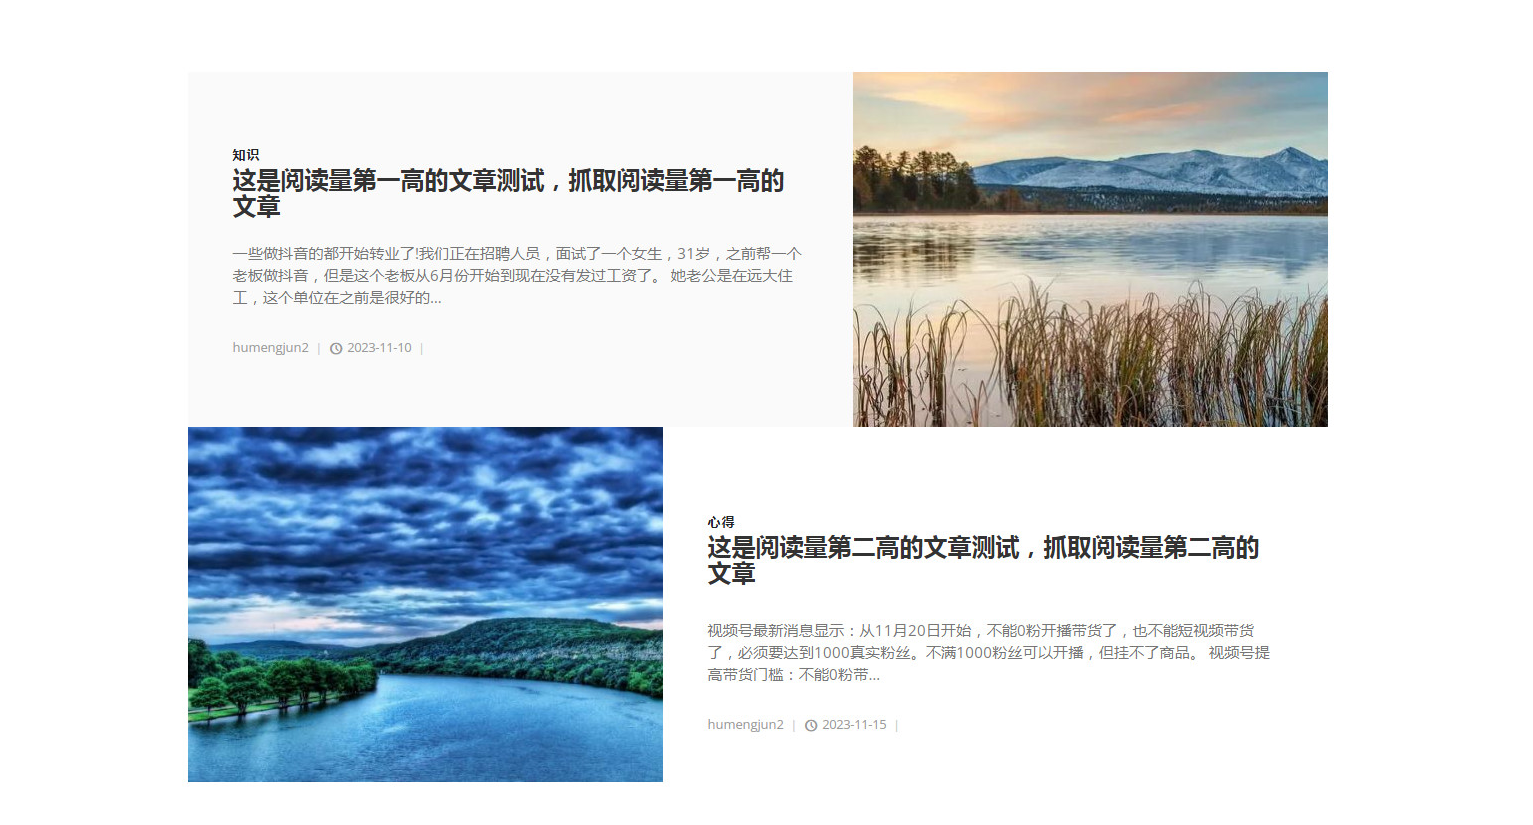
2023-11-16 制作首页热门文章调取hot.php
这个工程量挺大的,而且我觉得是小白的做法,目前也找不到其他办法,所以大家将就看吧!应该有更加简单的方法可以做到!
首先老规矩,新建hot.php,然后在index.php中调用<?php get_template_part('hot'); ?>
然后回到hot.php
增加如下代码:
<section class="featured-posts no-padding-top">
<div class="container">
<?php
$args = array( //创建一个新数组,用于获取热门文章2篇
'post_type' => 'post', // 获取文章类型
'posts_per_page' => 2, // 返回的文章数量
'meta_key' => 'views', // 按照阅读量排序
'orderby' => 'meta_value_num', // meta_value_num是wordpress自带的检索方式
'order' => 'DESC' // 降序排列
);
$popular_posts = new WP_Query($args); //然后把刚刚的检索出来的值,赋给 $popular_posts
if ($popular_posts->have_posts()) { //如果有文章可选
$popular_posts->the_post(); //就选出第一篇
echo '
<div class="row d-flex align-items-stretch">
<div class="text col-lg-7">
<div class="text-inner d-flex align-items-center">
<div class="content">
<header class="post-header">
<div class="category">';
the_category(''); //分类
echo '</div><a href="';
the_permalink(); //调取文章链接
echo '">
<h2 class="h4">';
the_title(); //文章标题
echo '</h2></a>
</header>
<p>';
the_excerpt();//获取文章摘要
echo '</p>
<footer class="post-footer d-flex align-items-center">';
echo'<div class="title"><span>';
the_author(); //获取文章作者
echo '</span></div>
<div class="date"><i class="icon-clock"></i>';
the_time('Y-m-d'); //获取文章发布时间
echo '</div>
</footer>
</div>
</div>
</div>
<div class="image col-lg-5">';
the_post_thumbnail(); // 获取当前文章的特色图片
echo '</div></div>';
$popular_posts->the_post();
echo '
<div class="row d-flex align-items-stretch">
<div class="image col-lg-5">';
the_post_thumbnail(); // 获取当前文章的特色图片
echo '</div>
<div class="text col-lg-7">
<div class="text-inner d-flex align-items-center">
<div class="content">
<header class="post-header">
<div class="category">';
the_category(''); //分类
echo '</div><a href="';
the_permalink(); //调取文章链接
echo '">
<h2 class="h4">';
the_title(); //文章标题
echo '</h2></a>
</header>
<p>';
the_excerpt();//获取文章摘要
echo '</p>
<footer class="post-footer d-flex align-items-center">
<div class="title"><span>';
the_author(); //获取文章作者
echo '</span></div>
<div class="date"><i class="icon-clock"></i>';
the_time('Y-m-d'); //获取文章发布时间
echo '</div>
</footer>
</div>
</div>
</div>
</div>';
}
wp_reset_postdata();
?>
</div>
</section>
上面都标明了注释,方便大家阅读!
但是在进行上述操作的时候,也遇到了很多问题
1 特色封面图的问题
首先,在编辑器中,没有特色图的选项,同时,需要选择第一张图片,变成默认封面图,需要在functions.php中加入:
//获取文章第一张图片用做特色图封面
add_theme_support('post-thumbnails');
function set_featured_image_from_first_image() {
global $post;
// 检查文章是否有特色图片
if (has_post_thumbnail($post->ID)) {
return;
}
// 获取文章内容中的第一张图片
$first_image = get_first_image_in_post($post->post_content);
// 如果找到了第一张图片,则将其设置为特色图片
if (!empty($first_image)) {
$upload_dir = wp_upload_dir();
$image_data = file_get_contents($first_image);
$filename = basename($first_image);
if(wp_mkdir_p($upload_dir['path'])) $file = $upload_dir['path'] . '/' . $filename;
else $file = $upload_dir['basedir'] . '/' . $filename;
file_put_contents($file, $image_data);
$wp_filetype = wp_check_filetype($filename, null );
$attachment = array(
'post_mime_type' => $wp_filetype['type'],
'post_title' => sanitize_file_name($filename),
'post_content' => '',
'post_status' => 'inherit'
);
$attach_id = wp_insert_attachment( $attachment, $file, $post->ID );
require_once(ABSPATH . 'wp-admin/includes/image.php');
$attach_data = wp_generate_attachment_metadata( $attach_id, $file );
wp_update_attachment_metadata( $attach_id, $attach_data );
set_post_thumbnail( $post->ID, $attach_id );
}
}
add_action('publish_post', 'set_featured_image_from_first_image');
// 从文章内容中获取第一张图片
function get_first_image_in_post($content) {
$first_image = '';
ob_start();
ob_end_clean();
$output = preg_match_all('/<img.+?src=[\'"]([^\'"]+)[\'"].*?>/i', $content, $matches);
if(!empty($matches[1][0])){
$first_image = $matches[1][0];
}
return $first_image;
}
2 摘要调取的问题,一个是摘要的字数,一个是默认的调取出来的摘要后面[…]有这样的小尾巴,因此,也需要在functions.php中加入:
//去除摘要尾巴的[…]
add_filter('excerpt_more', 'custom_excerpt_more');
function custom_excerpt_more($more) {
return '...'; // 将此处的省略号替换为你想要的任何文本
}
add_filter('excerpt_more', 'custom_excerpt_more');
//修改摘要显示的字数
function custom_excerpt_length($length) {
return 90; // 更改这里的数字为你想要的摘要长度
}
add_filter('excerpt_length', 'custom_excerpt_length', 999);
最后调整了一下模板的css文件,就完成了默认的热门文章调取,不过这边我偷懒,只调取了2篇,看大家兴致了!效果如下:
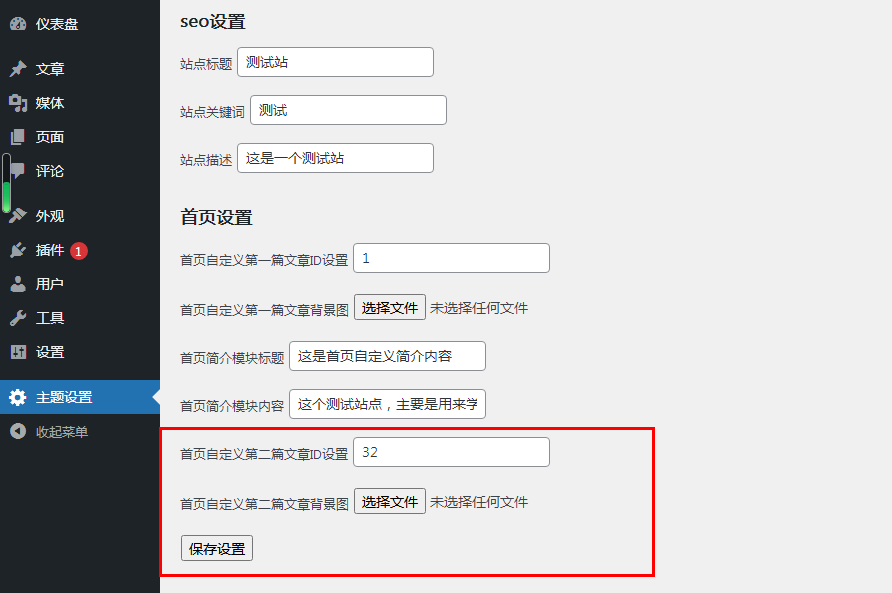
2023-11-17 首页第二个自定义文章
今天这个也比较简单,和之前的海报是一样的,就是上传图片和指定文章到数据库记录,可以参考海报内容~
这是后台代码:
<label for="name">首页自定义第二篇文章ID设置 </label>
<input type="text" id="name" name="shouyezhiding2" value="<?php echo get_option('shouyezhiding2'); ?>" />
<br>
<br>
<label for="theme_image2">首页自定义第二篇文章背景图</label>
<input type="file" name="theme_image2" id="theme_image2">
然后前面放上自定义文章数据库更新代码:
$shouyezhiding2 = $_POST['shouyezhiding2'];
update_option('shouyezhiding2', $shouyezhiding2);
然后这是图片上传部分
// 检查theme_image2是否有文件
if (!empty($_FILES['theme_image2']['name'])) {
// 上传图片到媒体库
$attachment_id2 = media_handle_upload('theme_image2','0');
// 图片是否上传到媒体库
if (!is_wp_error($attachment_id2)) {
// 获取附件的URL
$attachment_url_shouye2 = wp_get_attachment_url($attachment_id2);
// 将附件URL保存到数据库
update_option('theme_image_url2', $attachment_url_shouye2);
}
}
然后就是zidingyi2.php部分
<?php
$shouye_image_url2 = get_option('theme_image_url2');
echo '
<section style="background: url(' . $shouye_image_url2 . '); background-size: cover; background-position: center bottom" class="divider">';
?>
<div class="container">
<div class="row">
<div class="col-md-7">
<?php
$shouyezhiding2 = get_option('shouyezhiding2'); //获取自定义文章ID
$permalink2 = get_permalink($shouyezhiding2); //自定义文章链接
$title_zidingyi2 = get_the_title($shouyezhiding2); //自定义文章标题
echo '<h2>'.$title_zidingyi2.'</h2><a style="color: white;" href='.$permalink2.'>前往</a>';//输出调取
?>
</div>
</div>
</div>
</section>
最后后台界面如下:
然后前端首页如下图:
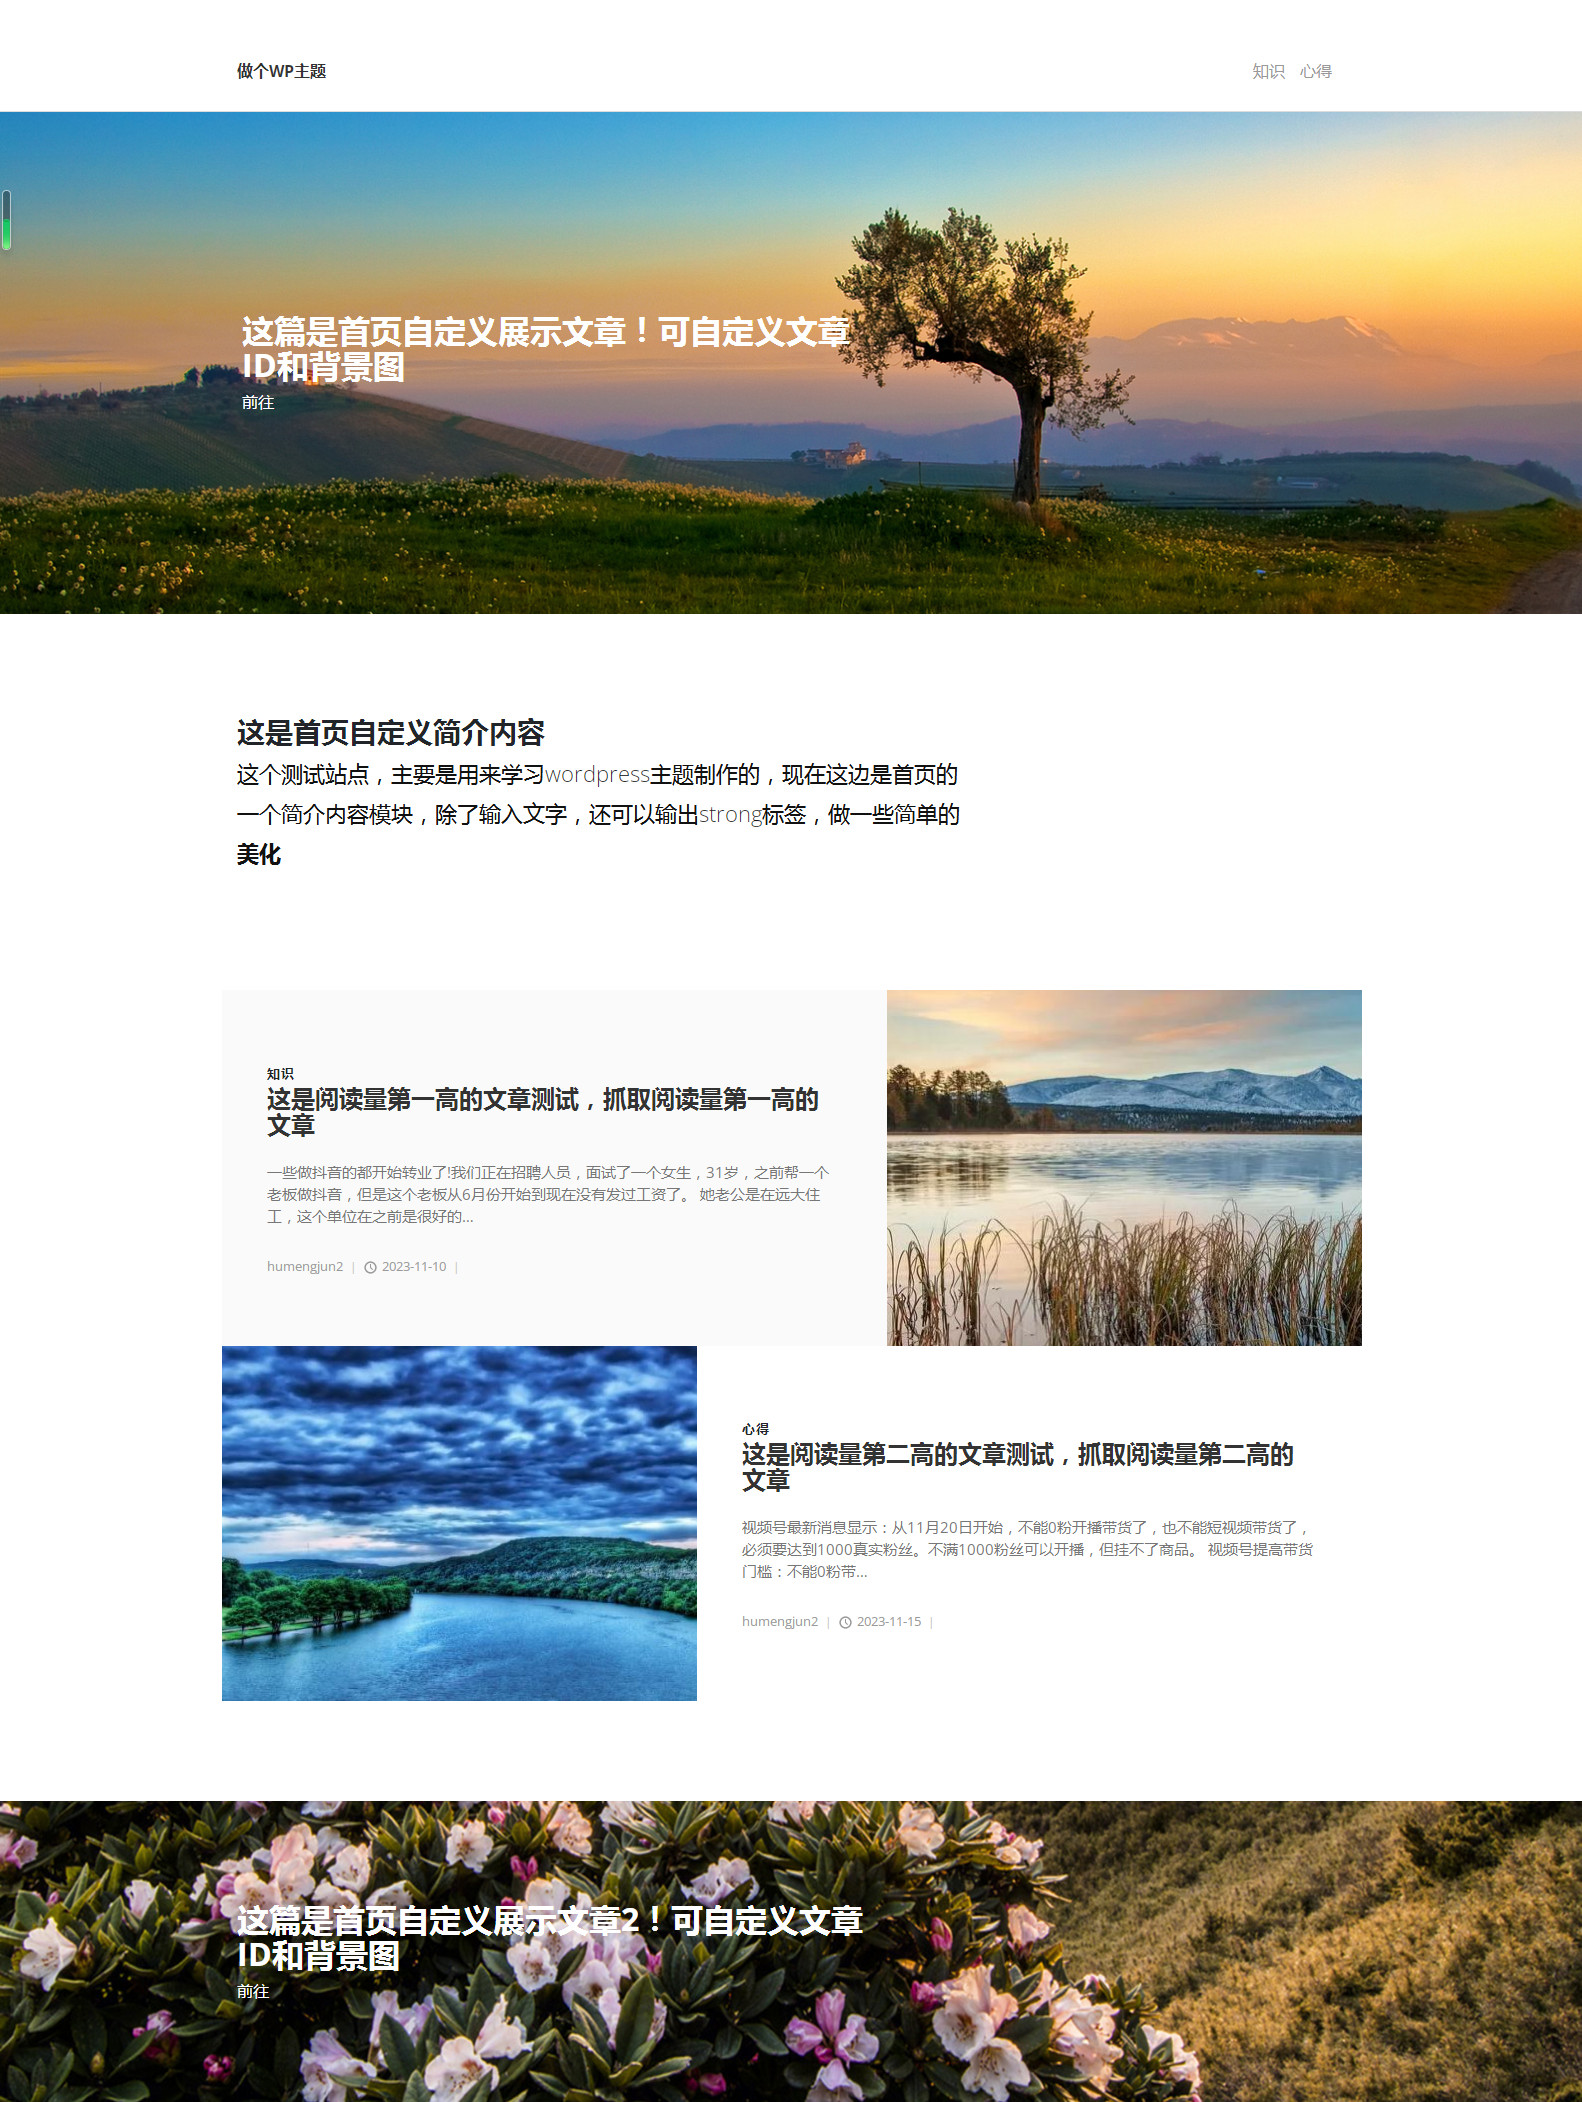
怎么样,效果不错吧?
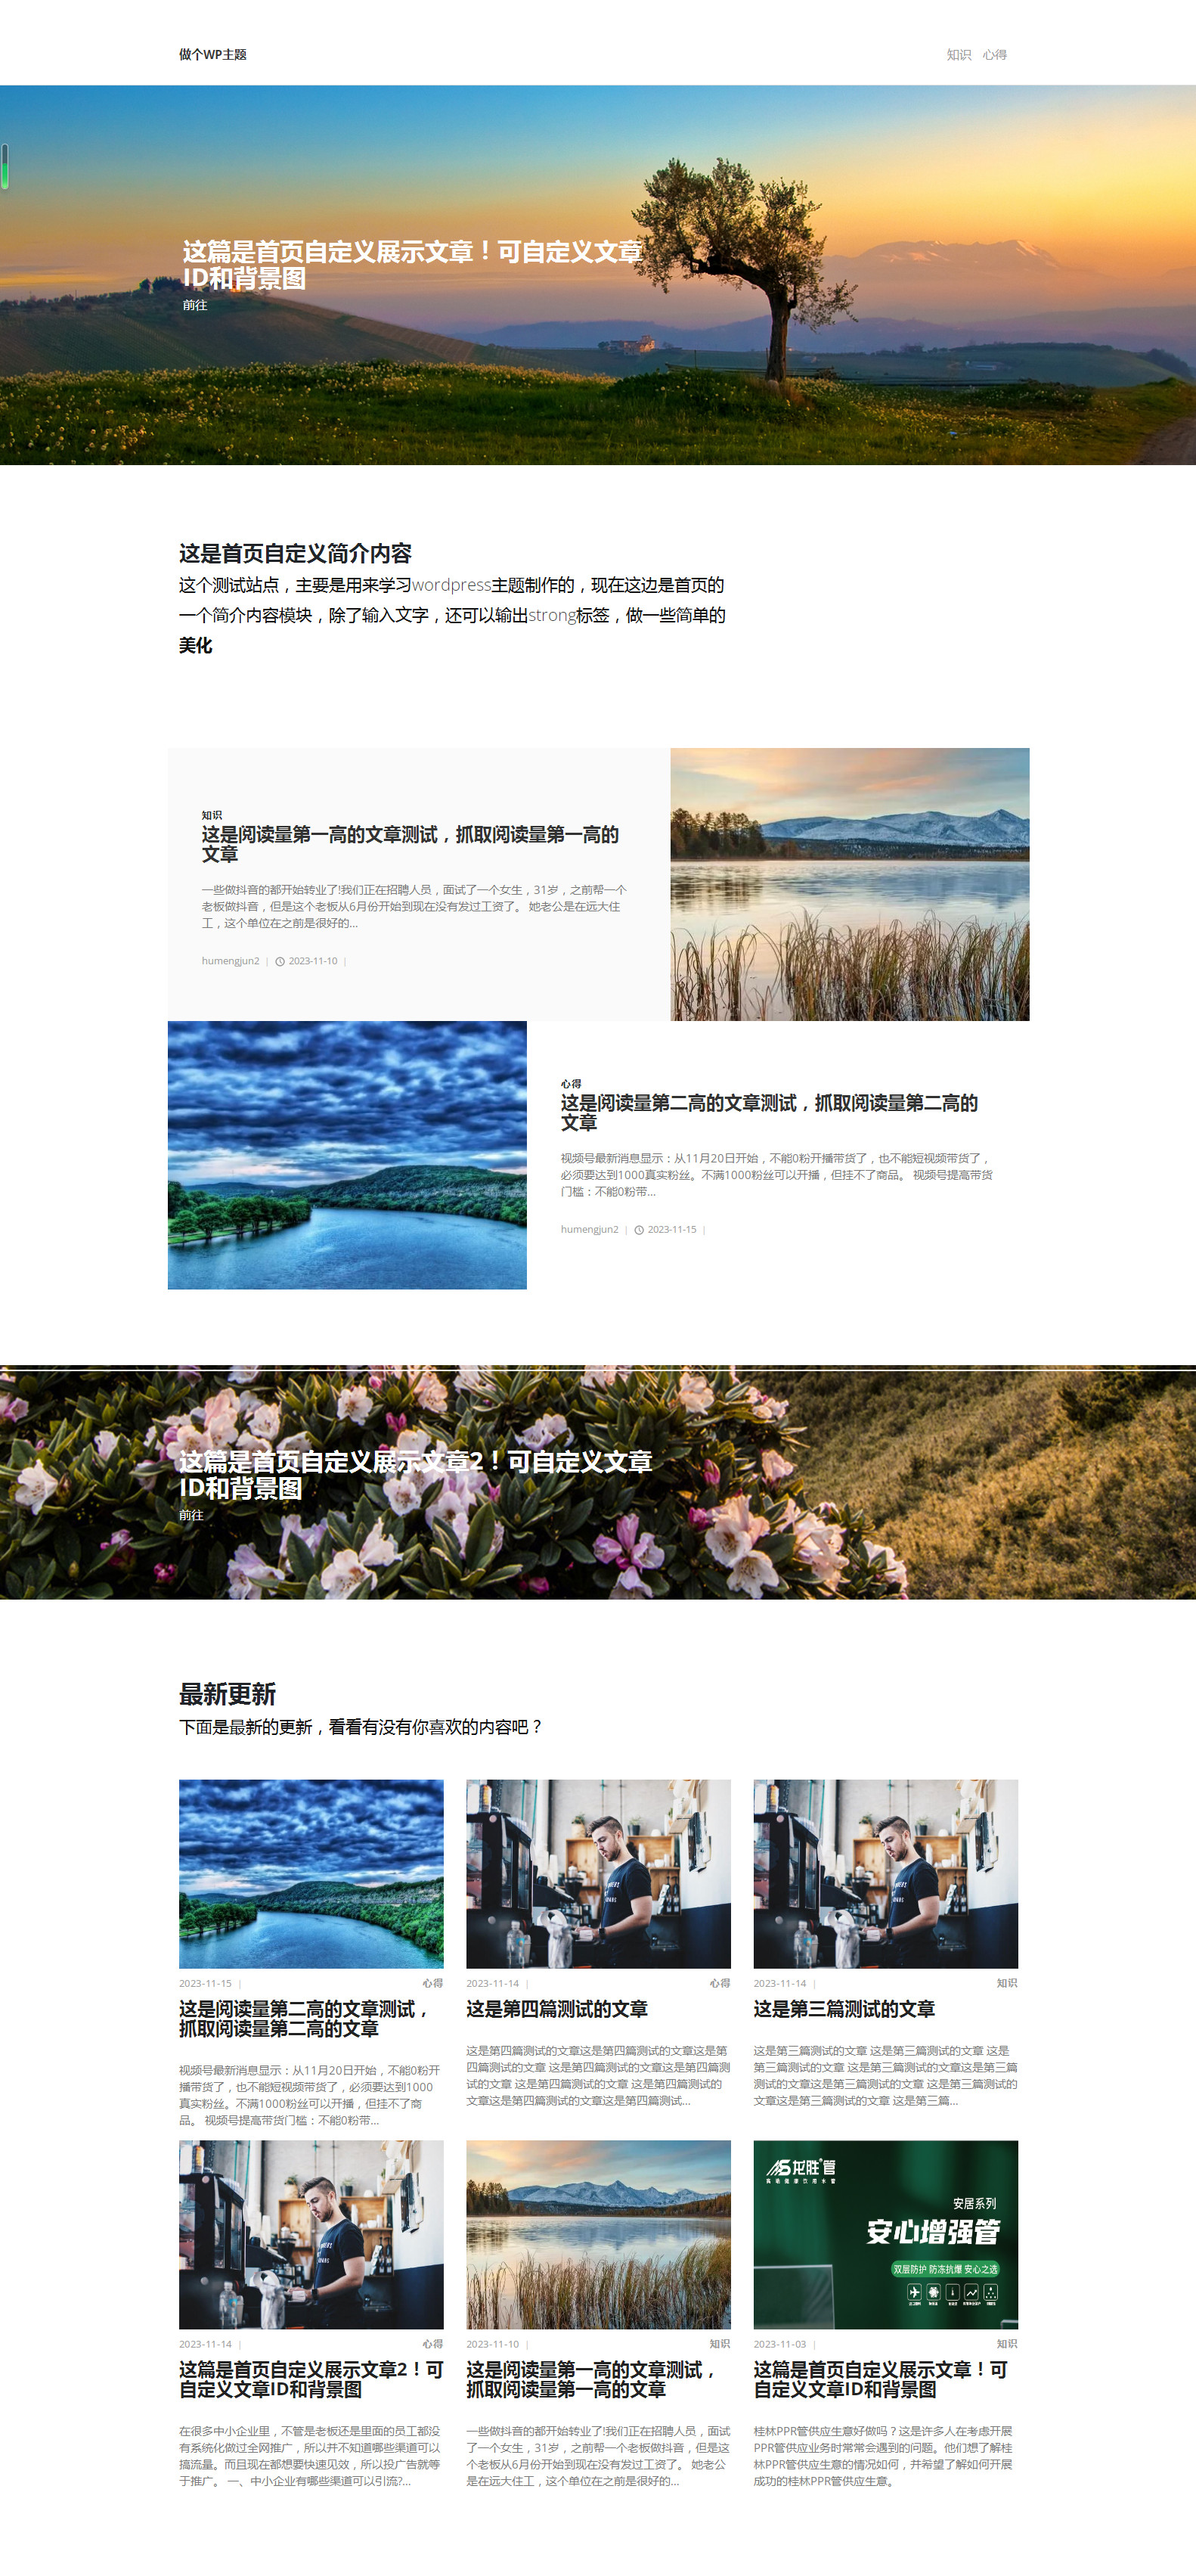
2023-11-17 制作首页最新文章列表shouyelist.php调取
列表调取,本来以为有点难度,结果和hot.php一个逻辑,抓取新的数组,然后进行while循环就完成了!
直接放代码:
<section class="latest-posts">
<div class="container">
<header>
<h2>最新更新</h2>
<p class="text-big">下面是最新的更新,看看有没有你喜欢的内容吧?</p>
</header>
<div class="row">
<?php
$args = array(
'post_type' => 'post',
'posts_per_page' => 6,
'orderby' => 'date',
'order' => 'DESC'
);
$query = new WP_Query($args);
if ($query->have_posts()) {
while ($query->have_posts()) {
$query->the_post();
echo '
<div class="post col-md-4">
<div class="post-thumbnail"><a href="post.html">';the_post_thumbnail();echo '</a></div>
<div class="post-details">
<div class="post-meta d-flex justify-content-between">
<div class="date">';the_time('Y-m-d');echo '</div>
<div class="category">';the_category();echo'</div>
</div><a href="post.html">
<h3 class="h4">';the_title();echo '</h3></a>
<p class="text-muted">';the_excerpt();echo '</p>
</div>
</div>
';
}
} else {
echo '没有找到文章。';
}
?>
</div>
</div>
</section>
但是在调取封面图时遇到了一个问题,就是有些文章没有封面图的,所以就在functions.php中,增加了一个没有封面图时,显示默认封面图
//没有封面特色图时,给一张默认的封面图
function default_post_thumbnail($html, $post_id, $post_image_id) {
if (empty($html)) {
$default_image_url = '/wp-content/themes/ceshi/img/blog-3.jpg'; //设置默认封面图的URL
$html = '<img src="' . esc_url($default_image_url) . '" alt="Default Thumbnail" />';
}
return $html;
}
add_filter('post_thumbnail_html', 'default_post_thumbnail', 10, 3);
最后,效果如下:
2023-11-18 底部footer.php制作
底部后台设置,还是老样子,就不弄了,到此首页调取制作就完成了